
Coche teledirigido
Aprovechamos el programa que enciende y apaga un led por Arduino Cloud
Variables
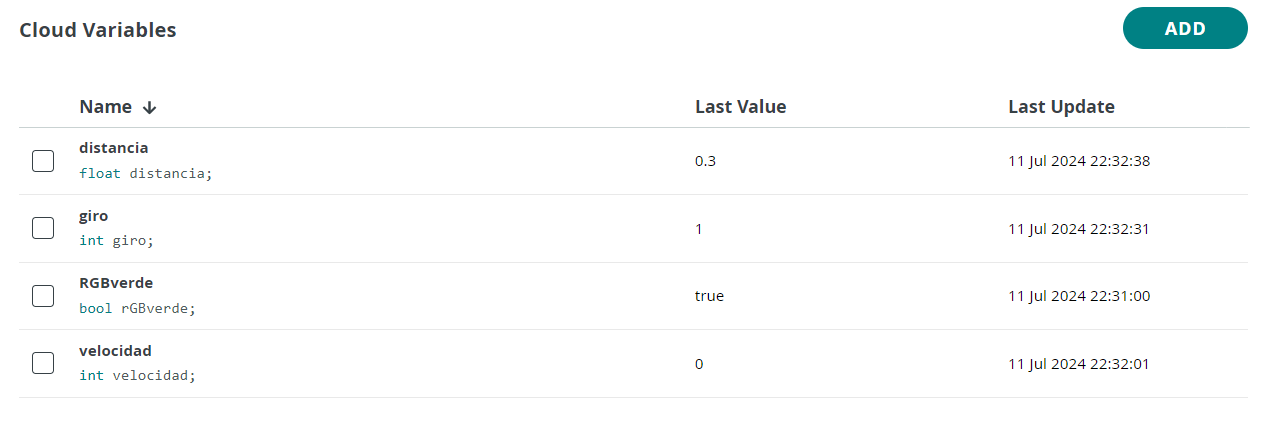
Le añadimos tres variables más :
Sketch
En thingProperties.h añade automáticamente estas variables y funciones, no tienes que añadirlas :
void onGiroChange();
void onVelocidadChange();
void onRGBverdeChange();

float distancia;
int giro;
int velocidad;
bool rGBverde;
Pero en la función principal, nosotros vamos a poner el siguiente código :
#include "thingProperties.h"
#include "Arduino_Alvik.h"

Arduino_Alvik alvik;

float distances[5];


void setup() {
  // Initialize serial and wait for port to open:
  Serial.begin(9600);
  // This delay gives the chance to wait for a Serial Monitor without blocking if none is found
  delay(1500);

  alvik.begin();

  // Defined in thingProperties.h
  initProperties();

  // Connect to Arduino IoT Cloud
  ArduinoCloud.begin(ArduinoIoTPreferredConnection);

  /*
     The following function allows you to obtain more information
     related to the state of network and IoT Cloud connection and errors
     the higher number the more granular information you’ll get.
     The default is 0 (only errors).
     Maximum is 4
 */
  setDebugMessageLevel(2);
  ArduinoCloud.printDebugInfo();

  /// MI CODIGO
  pinMode(D13,OUTPUT);
}

void loop() {
  ArduinoCloud.update();
  // Your code here

  alvik.drive(velocidad,giro);
  alvik.get_distance(distances[0], distances[1], distances[2], distances[3], distances[4]);
  distancia=distances[2];


}


/*
  Since RGBverde is READ_WRITE variable, onRGBverdeChange() is
  executed every time a new value is received from IoT Cloud.
*/
void onRGBverdeChange()  {
  // Add your code here to act upon RGBverde change
  if (rGBverde){
    digitalWrite(D13,HIGH);

  }else{
    digitalWrite(D13,LOW);

  }
}

/*
  Since RGBrojo is READ_WRITE variable, onRGBrojoChange() is
  executed every time a new value is received from IoT Cloud.
*/
void onRGBrojoChange()  {
  // Add your code here to act upon RGBrojo change
}


/*
  Since Velocidad is READ_WRITE variable, onVelocidadChange() is
  executed every time a new value is received from IoT Cloud.
*/
void onVelocidadChange()  {
  // Add your code here to act upon Velocidad change
}
/*
  Since Giro is READ_WRITE variable, onGiroChange() is
  executed every time a new value is received from IoT Cloud.
*/
void onGiroChange()  {
  // Add your code here to act upon Giro change
}